Objectives
Students will complete a phenakistoscope with 16 images, outlined and colored, that creates the illusion of continuous movement. They will further develop their understandings of the basic animation concepts, and in addition will be able to explain the concept of looping.

Preparations
Cut out a phenakistoscope template, starting with a circle at least 11 inches across. Evenly spaced around the edge are 16 slots (as pictured) that should be cut about an eighth of an inch wide and an inch and a half long. These allow for viewing the image in the mirror. Trace this template onto poster board for each student to cut out his or her own phenakistocope.


Introduction
Have students view examples of phenakistoscopes (filmed and originals) and ask questions such as:

  • Why do we see these images as moving?
  • How can phenakistoscopes make us aware of time?
  • Which way do you prefer viewing animation wheels? Why?


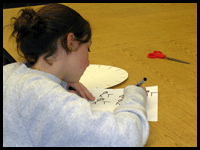
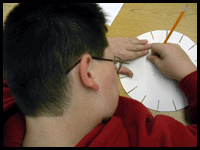
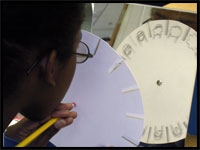
Phenakistoscope template

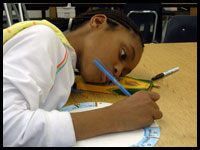
Materials
Poster board
Scissors
Pencils, black markers, colored pen and pencils
Mirrors, pencils, and thumbtacks


How do you make and view a phenakistoscope?


Have students fold a piece of sketch paper in half 4 times. This will create 16 frames where they can plan out their images for the 16 slots on their Animation Wheels before transferring their ideas onto the poster board circle.


Draw a picture in one of the sections, and then add fifteen sequential images, trying to end the sequence with an image very similar to the starting point.

Tips:

  • Make sure that each image is only a little different than the one before. This creates a smoother illusion of motion.

  • Start with an action that takes 8 frames to reach its peak and 8 more to return to its starting point.

  • Outline images with black marker and then color in with color pencils or magic markers.


To view the phenakistoscope, push a tack through the center of the poster board wheel, from the front, and then stick it into a pencil eraser. With your eye behind the wheel, look through the slots into a mirror, and then spin the wheel on its axis.


Tips:

  • Viewing works best when a bright light source is shining on the front of the image, such as sunlight or a flashlight.

  • Reinforcing the center of the wheel with tape will help keep the tack-hole from stretching with repeated use.


Have students share, view, and discuss each other's phenakistoscopes. As a bonus, you can also create video material by filming these animation wheels.

Evaluation
Instructors may evaluate this project using the general rubric provided. Select or add criteria depending upon the needs or levels of your students, and/or other curricular concerns. In addition to that formal final assessment I encourage teachers to conduct informal, in-progress assessment thinking about questions like these:

  • How successful was the student in creating smooth transitions between all 16 images?

  • How has the experience of making a phenakistoscope helped the student to understand and define the concept of looping?


© 2008 Karin Gunn. All rights reserved.
Last Updated: February 2008