Objectives Students will use a stopmotion technique to create
a simple two-dimensional and/or three-dimensional animation that
communicates an idea. They will also be able to define the concepts
of: placement, framing, direction, and speed.
Introduction
Show different examples of stop motion animation. Some DVDs of animation
include “Making Of” documentaries that can also be a
great way to begin discussing the techniques and strategies used
in stop motion.
Examples:
Monty Python’sFlying Circus (Work of
Terry Gilliam) available on video
How
Can Students Create an Animated Stop Motion Narrative?
Brainstorming
Have students spend up to an hour discussing, brainstorming, and
writing everything down. Challenge students in suggesting new ideas
and adding to existing ideas. Even weak ideas can be developed into
something good!
Tips:
Remind students that great ideas can come from
simple, every day experiences.
Have students take notes and write down their thoughts
on the plot, the scenes, the characters, and any extra details
that come to mind while they are writing.
KEEP IT SIMPLE! The shortest and simplest concepts
are the easiest to animate. Limit them to one or two characters,
so that they can concentrate on the details.
The approach students take (2-D, 3-D or combined)
should support their overall idea.
Scripting
A script is the written description of the actions that will take
place. Ask students questions such as:
What is your theme or idea?
What sort of personality would you like to create?
How long do you plan for this to be? How many frames and fps
is that? (Make them do the math!)
Who in your group will do which production jobs?
What materials or objects will you need to collect?
What kind of background will you need?
Will 2D or 3D technique work better for this particular story?
Why?
What different shots do you need? What close-ups?
Attach your storyboard! Have you varied the scale, pace, angle
or whatever of the shots?
What else do you want to say about your idea?
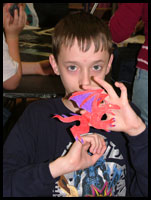
Cut paper character
Storyboarding
The story then is ready to be visually depicted as a storyboard outlining
the plot, characters, and backgrounds. Remind students that storyboarding
and planning on paper saves time and energy because they will figure
out all the details before committing to the animation. Storyboarding
will also ensure that each group selects the one approach best suited
to the basic concept they’ve identified. Using poster board,
preferably large, and a packet of Post-it-notes, sort out the ideas
and images to be used. Divide up the page, discuss the sequence of
shots, and draw in key transitions or moments, making notes as necessary.
Label each section of the storyboard with sequence, camera angle,
timing, and other directorial information as you go.
Set-ups
Once groups have decided on the story they will be telling and have
created their storyboards, they need to begin gathering their props,
characters, and back drops to be ready to film their animation.
Background Backgrounds for stop motion animation
can be created from just about any materials you have on hand:
Art materials such as: crayons, markers, construction paper,
colored paper, watercolors, cardboard boxes, whiteboard, blackboards,
tempera paint, clay, etc.
Real objects: a rock for a boulder, a branch for a tree, etc.
Animated background: one that changes during the course of your
animation.
Remember, arranging a 3D space with objects in the foreground can
give your animation a nice sense of depth. Make sure that your background
is the same scale as your characters, and that it will fill the
frame for whatever camera you will use to capture the images.
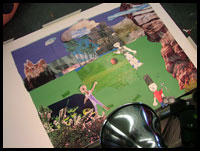
Cut paper background
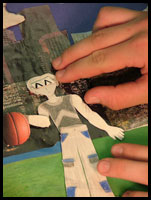
Cut paper character close-up
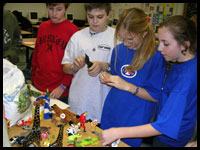
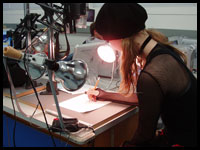
Student working on Animation Stand
Camera
You can use almost any camera to capture the individual frames of
your animation. The advantage of using a digital camcorder is that
it can save each picture directly onto the computer's hard drive as
you take it.
Animation Stand
In 2D stop motion animation, the camera is positioned directly above
the background upon which the cutout characters lay flat.
Tripod
The camera is mounted on a tripod because you don't want the camera
to move at all during the picture-taking process.
Evaluation
Instructors may evaluate this project using the general
rubric provided. Select or add criteria depending upon the needs
or levels of your students, and/or other curricular concerns. This
lesson introduces new terminology therefore instructors should give
a quiz. In addition to that formal final assessment I encourage
teachers to conduct informal, in-progress assessment thinking about
questions like these:
How well are the groups working together?
How well are group members communicating?
To what extent is each group member contributing to the project?